
Mushroom Grow Kit Timeline: What to Expect at Every Stage

Mushroom Grow Kit Timeline: What to Expect at Every Stage
If you’re using a mushroom grow kit for the first time, one of the biggest questions is simple: how long does a mushroom grow kit take?
Mushrooms can develop surprisingly quickly once fruiting begins, but the entire process involves several distinct stages. Understanding the typical mushroom grow kit timeline can help you recognise normal development, identify potential problems and know what to expect as your kit progresses.
The exact timeline varies depending on the mushroom species, type of grow kit, temperature, humidity, fresh-air exchange and other environmental factors. Some kits may progress faster or slower than the estimates below.
This guide breaks down the mushroom grow kit process stage by stage, from the initial setup through colonisation, pinning, fruiting, harvesting and subsequent flushes.
Important: Always follow the instructions supplied with your particular grow kit. Cultivation laws can also vary depending on the mushroom species and your location.
How Do Mushroom Grow Kits Work?
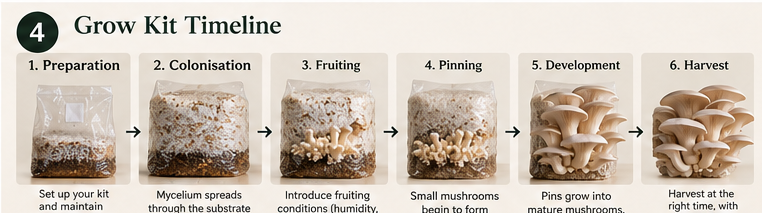
A typical mushroom cultivation timeline can be divided into several stages:
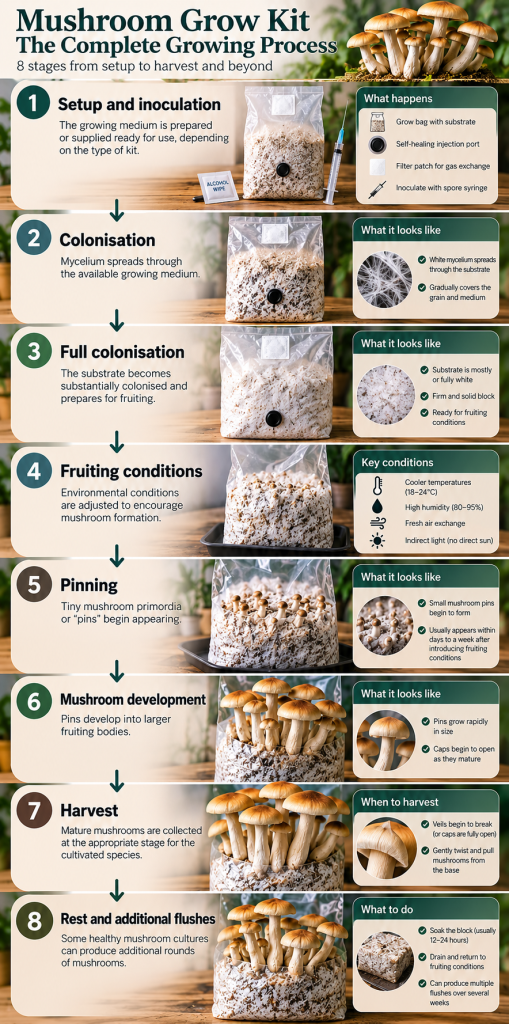
Stage 1 — Setup and inoculation
The growing medium is prepared or supplied ready for use, depending on the type of kit.
Stage 2 — Colonisation
Mycelium spreads through the available growing medium.
Stage 3 — Full colonisation
The substrate becomes substantially colonised and prepares for fruiting.
Stage 4 — Fruiting conditions
Environmental conditions are adjusted to encourage mushroom formation.
Stage 5 — Pinning
Tiny mushroom primordia or “pins” begin appearing.
Stage 6 — Mushroom development
Pins develop into larger fruiting bodies.
Stage 7 — Harvest
Mature mushrooms are collected at the appropriate stage for the cultivated species.
Stage 8 — Rest and additional flushes
Some healthy mushroom cultures can produce additional rounds of mushrooms.
Rather than treating these stages as an exact countdown, think of them as a biological progression. The appearance and condition of the culture are often more informative than the number of days that have passed.
1. Setting Up Your Mushroom Grow Kit
The first stage depends heavily on what type of mushroom grow kit you have purchased.
Some kits arrive with a substrate that has already been colonised with mushroom mycelium and may be nearly ready for fruiting.
Others require additional preparation before colonisation begins.
Before doing anything, read the instructions included with your kit carefully.
Different mushroom species can require different environmental conditions, and following generic advice instead of the instructions designed for your particular kit can cause problems.
What should you check?
Before beginning, inspect your kit for:
Damage to the grow bag or container
Unusual colours or obvious contamination
Excessive standing water
Broken filter patches
Damaged injection ports
Unexpected smells when applicable and safe to inspect
A healthy mushroom culture is typically dominated by the expected mycelium for the species being cultivated.
Your Next Read → Mushroom Grow Kit Contamination Guide
Stage 2: Mycelium Colonisation
Colonisation is one of the most important stages of mushroom cultivation.
Mycelium is the vegetative network of fungi. Instead of immediately producing mushrooms, the fungus first grows through and establishes itself within its available food source.
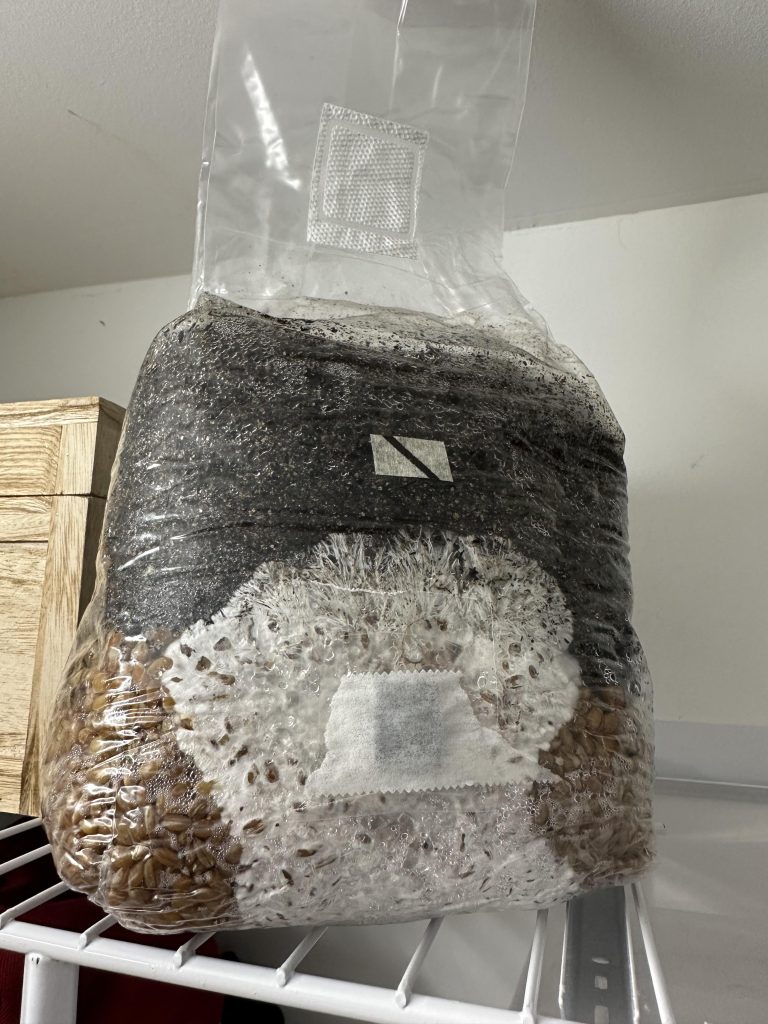
During this stage, you may notice white mycelial growth gradually spreading through the growing medium.
What does healthy colonisation look like?
Depending on the species, healthy mycelium may appear:
White
Dense or fluffy
Thread-like
Web-like
Increasingly widespread throughout the substrate
The appearance can vary considerably between species and growing conditions.
One of the biggest mistakes beginners make is assuming that slower-than-expected colonisation automatically means something has gone wrong.
Fungi are living organisms.
Two otherwise identical grow kits can progress at different speeds because of relatively small environmental differences.
How long does colonisation take?
There is no universal colonisation time.
Species, substrate composition, temperature, inoculation method and the amount of established mycelium can all influence how quickly colonisation occurs.
Instead of focusing exclusively on the calendar, monitor the progress of the mycelium through the substrate.
Want more info on this topic? Read → Common Mushroom Grow Kit Mistakes
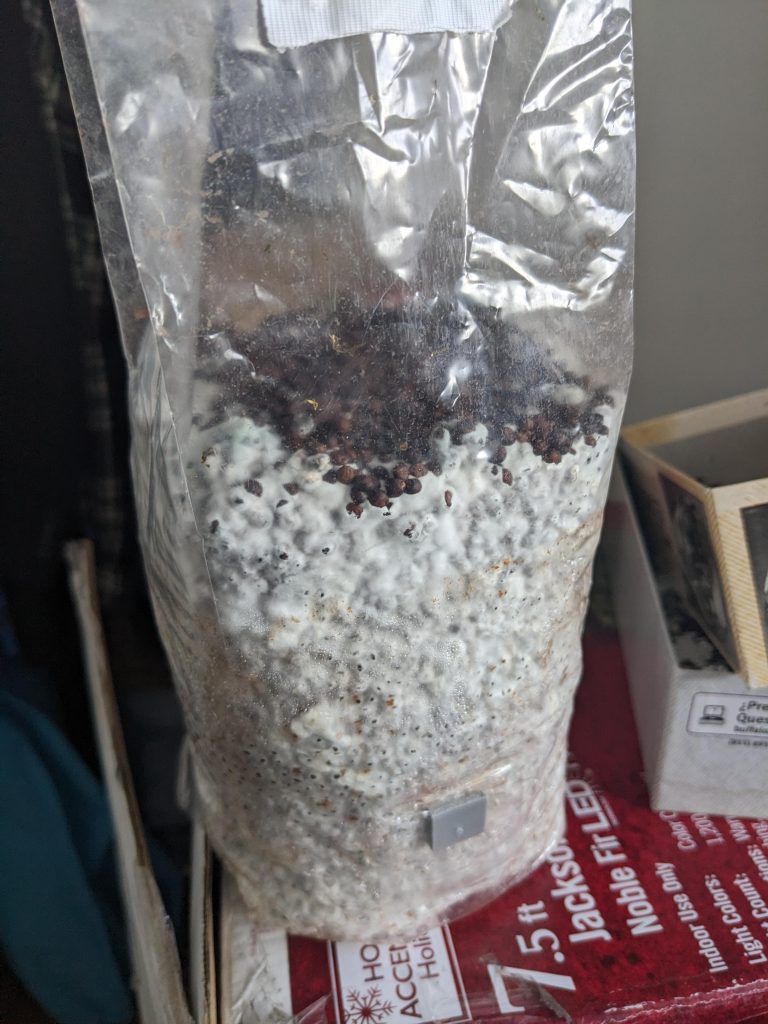
Stage 3: Full Colonisation
Eventually, the mycelium should occupy most or all of the intended substrate.
This represents an important transition.
The fungus has established its vegetative network and may soon be capable of producing fruiting bodies under suitable conditions.
A well-colonised substrate often appears substantially covered in mycelium, although appearance varies between mushroom species and substrate types.
Don’t rush this stage
Seeing substantial mycelial growth can make it tempting to immediately change the environment.
However, visible surface growth does not necessarily mean that every part of the substrate has reached the same stage.
Following the instructions for your specific kit is more reliable than making changes simply because a particular number of days has passed.
Stage 4: Introducing Fruiting Conditions
Once an appropriate edible or otherwise legally cultivable mushroom culture has reached the correct stage, its environment can be transitioned toward the fruiting conditions appropriate for that species.
Several environmental signals influence mushroom fruiting.
These can include:
Humidity
Temperature
Fresh-air exchange
Moisture availability
Light
Surface conditions
The balance between these factors matters.
For example, simply adding more water does not necessarily improve fruiting. Excessive moisture can create its own problems.
Likewise, insufficient humidity can cause exposed surfaces to dry prematurely.
For a detailed explanation of these environmental factors:
Another Read → Mushroom Fruiting Conditions Explained